Line art, a fundamental aspect of drawing, provides the basic structure for many illustrations. Understanding proportion, especially in relation to anatomy, is key for realistic depictions. If you’re curious about illustration software that helps in visualizing forms, there are lots of free and paid resources online. With practice and the right tools, mastering how to draw a small and simple middle finger becomes surprisingly achievable.
The middle finger gesture, a symbol laden with historical baggage and often perceived as an act of defiance, has firmly entrenched itself in popular culture. While its use in real-life situations can be considered offensive, its symbolic representation offers a unique avenue for artistic exploration.
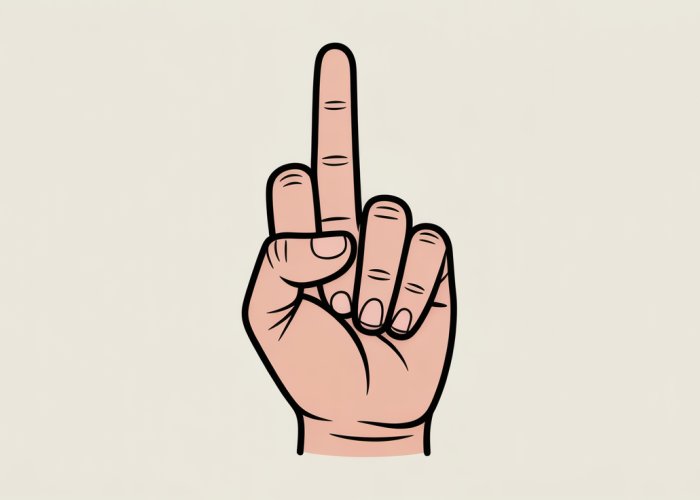
This tutorial aims to guide you through the process of creating a simple, cartoon-style drawing of this infamous hand gesture.
Consider this an exercise in artistic expression, a playful exploration of form and line, approached with a light-hearted spirit. This endeavor focuses on the artistic merit of the symbol, divorced from any intention to offend or provoke.
Embracing the Symbol: Art Over Offense
Navigating the controversial nature of the middle finger requires a degree of tact. The goal here isn’t to glorify the gesture or endorse its inappropriate use.
Instead, we’re repurposing it as a subject for artistic interpretation.
By approaching the drawing process with a focus on form, technique, and creative expression, we can transform a potentially offensive symbol into a harmless, even humorous, piece of art.
Defining the Objective: A Small, Simple Sketch
This tutorial prioritizes simplicity and accessibility. The objective is to create a small, easily reproducible drawing, perfect for beginners.
We’ll focus on capturing the essence of the gesture without getting bogged down in complex anatomical details.
Think of it as a stylized representation, a cartoonish interpretation that emphasizes clarity and ease of execution.
Setting the Tone: Light-hearted and Artistic
It’s crucial to establish a clear understanding: This tutorial is intended for artistic expression and light-hearted fun.
We are not promoting offensive behavior or encouraging the disrespectful use of this gesture.
The intention is to provide a safe and creative space for artistic exploration, where we can learn to draw and express ourselves without causing harm or offense. Embrace the humor, focus on the technique, and enjoy the process of bringing this unusual subject to life on paper.
Gather Your Artillery: Essential Drawing Materials
Before embarking on our artistic journey, let’s ensure we have the right tools at our disposal. The beauty of this exercise lies in its simplicity – you won’t need a fancy art studio or expensive equipment. Just a few basic materials will suffice to bring our cartoon middle finger to life on paper.
The Core Necessities
Let’s discuss the three absolute must-haves for this drawing endeavor: a pencil, paper, and an eraser.
- Pencil: The humble pencil is our primary instrument. An HB pencil, or any standard drawing pencil you have lying around, will work perfectly. The key is to choose a pencil that allows for smooth, consistent lines. This allows easy erasing during the initial sketching phases.
- Paper: Don’t overthink this one. A simple sketchbook or even plain printer paper will do the trick. The goal here is to practice and explore, so any readily available paper surface is suitable. Focus on the drawing, not the paper’s texture or weight.
- Eraser: Mistakes are part of the process, and that’s where the eraser comes in. A standard eraser, or even a kneaded eraser if you have one, will help you clean up lines and refine your drawing as you go.
Sharpening Your Focus (and Your Pencil)
If you’re using a traditional wood-cased pencil, don’t forget a sharpener! A sharp point will allow for finer lines and greater detail, especially when we get to refining the drawing.
Accessibility is Key
The emphasis here is on using readily available materials. There’s no need to invest in expensive art supplies to complete this tutorial. The goal is to make art accessible and enjoyable for everyone, regardless of their artistic background or budget.
Before we bring our middle finger to life, we need to understand the basic building blocks of the hand. You don’t need to be a master of anatomy to draw a convincing cartoon hand.
Laying the Foundation: Basic Hand Structure Simplified
We’re aiming for a simplified representation. Forget about intricate muscle details and complex bone structures for now.
This section is all about creating a foundation using simple shapes that even beginners can easily grasp.
The Power of Simplification for Beginners
Drawing the human hand can be intimidating, even for experienced artists. All those bones, muscles, and tendons! It’s easy to get lost in the details and feel overwhelmed.
Our goal is to bypass the complexity and focus on the fundamental forms that make up the hand. We are using a simplified approach to hand anatomy for beginners.
This allows us to create a recognizable and expressive hand without getting bogged down in anatomical accuracy.
Deconstructing the Hand: Simple Shapes to the Rescue
The key to simplifying the hand is to break it down into basic geometric shapes. Instead of seeing a complex arrangement of bones and muscles, think of it as a combination of rectangles, ovals, and cylinders.
This approach makes it much easier to visualize and construct the hand on paper.
The Palm: Your Anchor Point
The palm is the foundation of the hand, and we’ll represent it with a simple shape like a rectangle or an oval.
Think of it as the central block from which the fingers will extend.
The specific shape you choose (rectangle or oval) depends on the desired style and hand position.
Fingers: Cylinders and Elongated Rectangles
The fingers can be represented by cylinders or elongated rectangles.
These shapes capture the basic form and proportions of the fingers.
Consider how the fingers taper slightly towards the tips.
For our cartoon middle finger, the middle finger will be the longest of these shapes, naturally.
Also consider foreshortening when drawing the fingers.
Visualizing the Structure: Diagrams for Clarity
While the concept of using simple shapes is straightforward, seeing it in action can be incredibly helpful.
If possible, refer to simple diagrams or illustrations that demonstrate how to break down the hand into these basic forms.
Visual learners especially benefit from seeing the shapes overlaid on a hand, making the process more intuitive. Look at hand diagrams to help you draw!
Of course. Here is the requested section:
Sketching the Star: Drawing the Middle Finger Step-by-Step
With the foundation laid, we can now bring the main focus of our artwork to life: the middle finger. This stage involves carefully sketching the finger, ensuring it stands out as the longest and most prominent, while also paying attention to the placement and proportions of the other fingers relative to the palm.
Step 1: The Foundation – Drawing the Basic Palm Shape
Begin by lightly sketching the basic shape of the palm. Remember from the previous section, this could be a rectangle or a slightly rounded oval.
Think of it as the anchor point for all the fingers, providing a solid base from which they extend.
Keep the lines light as this is just the initial construction.
Step 2: The Main Attraction – Sketching the Middle Finger
Now it’s time to sketch the middle finger, the undisputed star of our composition. Represent this finger as a cylinder or an elongated rectangle, extending upwards from the center of the palm.
This is the longest finger, so make it noticeably taller than the others will be.
Pay close attention to its vertical alignment; a slightly off-kilter finger can significantly change the gesture’s impact.
Step 3: The Supporting Cast – Adding the Other Fingers
Next, add the surrounding fingers: the index, ring, and pinky. These fingers should be shorter than the middle finger and gently bent inwards towards the palm.
Imagine them as partially folded, creating a sense of enclosure around the central finger.
The spacing between these fingers is also important. Avoid making them too close together or too far apart, as this can affect the hand’s realism.
Step 4: Refining the Form – Adding Details and Curves
With the basic structure in place, it’s time to refine the finger shapes. Add subtle curves to the cylinders to make them appear more natural.
Define the knuckles by adding slight bulges at the joints.
Remember, real fingers are not perfectly straight, so avoid sharp, rigid lines.
These small details contribute significantly to the overall realism of the drawing.
The Importance of Proportions
Throughout this process, constantly check the proportions of the fingers relative to the palm. The middle finger should be noticeably longer than the others, and the other fingers should decrease in length as they move outwards from the center.
Maintaining correct proportions is crucial for creating a believable and visually appealing hand. If something looks off, don’t hesitate to erase and redraw until you achieve the desired effect.
Adding Definition: Refining Your Middle Finger Drawing for Clarity
With the initial sketch in place, the foundation laid, and the gesture roughed out, we now move to the critical stage of refining your drawing. This is where the intention becomes clear, the form solidifies, and your middle finger drawing starts to take on its final, more polished appearance.
This process involves carefully adding definition, cleaning up stray lines, and ensuring the overall clarity of the image.
Strengthening the Foundation: Darkening the Key Lines
The first step in adding definition is to go back over your initial sketch lines, but this time, with a slightly firmer hand.
The goal here is not to create overly heavy outlines, but rather to subtly reinforce the lines that define the final shape of the finger and hand.
Think of it as tracing over your initial sketch, but with a more decisive and confident stroke. Use slightly darker pressure, to distinguish the final form from the initial guide lines.
Erasing the Ghosts: Removing Construction Lines
Once you’ve reinforced the key lines, it’s time to eliminate the clutter. Grab your eraser and gently remove any remaining construction lines, guidelines, or initial sketch marks that are no longer needed.
This step is crucial for creating a clean and polished final drawing.
Be careful not to erase the lines you want to keep!
Use a light touch and work slowly, ensuring that you remove only the unnecessary marks. A kneaded eraser can be particularly helpful here, as it allows you to gently lift graphite from the page without damaging the surrounding lines.
Honing the Details: Refining Joints and Knuckles
With the basic shape defined and the construction lines removed, you can now focus on refining the details of the drawing.
Pay particular attention to the finger joints and knuckles. These areas often require a bit more attention to create a natural and believable look.
Subtly round out the knuckles and add slight curves to the finger segments to give them more volume and form.
Avoid making the fingers too straight or rigid; a slight bend or curve will make them appear more realistic. Observe your own hand and fingers for reference.
Remember, the goal is to create a drawing that is both expressive and visually appealing. By taking the time to add definition, refine the lines, and clean up the sketch, you can elevate your drawing from a rough idea to a polished piece of art.
Erasing the stray pencil marks and solidifying the key lines breathes a new life into our middle finger drawing. But before we declare our work complete, it’s worth considering a few optional enhancements. These final touches, though not strictly necessary, can significantly elevate the visual impact of your artwork.
Polishing the Presentation: Final Touches and Optional Details
Adding final touches is about personalizing your drawing and bringing out its character. These are stylistic choices that depend entirely on the look you’re aiming for.
The Subtle Art of Shading
Shading is a powerful tool for creating the illusion of depth and volume. Even minimal shading can make a two-dimensional drawing appear more three-dimensional.
The key is to keep it simple, especially for beginners.
Consider where light would naturally fall on the hand and fingers.
Areas facing the light source should be left lighter, while areas in shadow should be shaded.
A simple way to achieve this is by using light, even strokes with your pencil.
You can also use your finger or a blending stump to gently smudge the graphite, creating smoother transitions between light and shadow.
Remember, the goal is not photorealism, but rather to suggest volume and form in a subtle way.
Defining the Form with Outlines
Outlining involves tracing over the existing lines of your drawing with a slightly thicker line.
This can help to make the drawing stand out more, especially if you plan to display it digitally.
Use a fineliner pen or a slightly softer pencil for this purpose.
Experiment with different line weights to see what works best for your style.
For instance, you might use a thicker line for the outer edges of the hand and a thinner line for the interior details.
However, be cautious not to overdo it.
A heavy outline can sometimes make a drawing look flat and cartoonish.
The Importance of Style and Personal Preference
Ultimately, the decision of whether or not to add shading or outlining comes down to personal preference and the desired style of your drawing.
There’s no right or wrong answer.
If you’re going for a clean, minimalist look, you might choose to skip these steps altogether.
If you want to add a bit more visual interest, a touch of shading or a subtle outline can make all the difference.
The best approach is to experiment and see what you like best.
Drawing a Middle Finger: Frequently Asked Questions
Got questions about flipping the bird in artistic form? Here are a few answers to common questions about how to draw a middle finger.
What’s the easiest way to start drawing a middle finger?
Start with basic shapes! Think of the hand as a simplified rectangle or trapezoid. Then, add cylinders for the fingers. This foundation makes it easier to build the details and learn how to draw a small and simple middle finger.
How do I make the middle finger look realistic?
Pay attention to proportions. The middle finger is typically the longest. Also, consider the slight curves and folds of the skin. Add subtle shading to create depth and make your drawing look more realistic when you learn how to draw a small and simple middle finger.
What if I struggle with drawing hands in general?
Don’t worry, hands are tricky! Practice drawing individual fingers separately. Focus on the joints and how they bend. Look at your own hand as a reference while you learn how to draw a small and simple middle finger. The more you practice, the better you’ll get.
What details should I focus on to make the drawing expressive?
Think about the angle and position of the hand. A slightly bent middle finger can convey a different message than a perfectly straight one. Focus on adding subtle details like wrinkles and shading to add personality and meaning to your drawing as you learn how to draw a small and simple middle finger.
And there you have it! Now you know how to draw a small and simple middle finger. Go practice and have some fun with it!