Thinking about tackling a propane regulator fix yourself? Understanding the cost to replace a propane regulator for home labor is crucial before you even pick up a wrench. Propane tanks, integral to many home appliances, rely on a functioning regulator to deliver the correct gas pressure. Without it, your gas grill or furnace might not work safely. Improper installation often leads to hiring a qualified HVAC technician, which significantly impacts your overall expenses. So, let’s unravel the details to help you decide if a DIY approach is right for you, and what that total cost realistically looks like.
Unveiling the Secrets to Propane Regulator Replacement
The propane regulator, often an unsung hero in our homes and RVs, plays a vital role in ensuring the safe and efficient operation of propane-fueled appliances. From heating our homes to powering our grills, propane provides a versatile energy source. However, its high-pressure nature demands careful management, and that’s precisely where the regulator steps in.
This blog post aims to illuminate the often-murky waters surrounding propane regulator replacement. We’ll delve into the costs involved, explore the feasibility of DIY replacement, and, above all, underscore the critical importance of safety. Understanding the regulator’s function is the first step towards ensuring a safe and reliable propane system.
The Propane Regulator: A Guardian of Pressure
At its core, a propane regulator is a pressure-reducing valve. Propane tanks store gas at very high pressure, far too high for most appliances to handle safely. The regulator’s job is to step down this pressure to a usable level, typically around 11 inches of water column (WC) for most household appliances.
Think of it as a translator, converting the "loud" language of the propane tank into a "whisper" that your furnace or stove can understand. Without it, appliances would be overwhelmed, leading to damage or, worse, dangerous situations.
Why a Properly Functioning Regulator Matters
A malfunctioning propane regulator can manifest in a variety of ways, all of which can compromise safety and efficiency. A regulator that allows too much pressure can damage appliances, create dangerously large flames, or even lead to explosions. Conversely, a regulator that doesn’t allow enough pressure can cause appliances to function poorly or not at all.
Beyond safety, a properly functioning regulator is essential for fuel efficiency. An inconsistent or incorrect pressure supply can lead to wasted propane and increased energy bills. Regularly checking and maintaining your regulator is a small investment that pays dividends in safety and savings.
The Cost Landscape: DIY vs. Professional Installation
Replacing a propane regulator involves a cost-benefit analysis. Do you tackle the project yourself, or enlist the help of a qualified professional? The answer hinges on a number of factors, including your comfort level with DIY projects, your understanding of propane systems, and, of course, your budget.
A new propane regulator itself can range in price depending on the type and brand. DIY installation can save on labor costs, but it also requires the purchase of necessary tools and the allocation of your own time. Professional installation, on the other hand, comes with labor fees but offers peace of mind knowing the job is done correctly and safely. We will explore the cost differences in a later section.
Safety First: A Non-Negotiable Imperative
Working with propane systems demands a heightened awareness of safety protocols. Propane is a flammable gas, and even small leaks can create dangerous conditions. Before undertaking any work on your propane system, it’s crucial to understand the risks involved and take appropriate precautions.
This includes working in a well-ventilated area, avoiding open flames or sparks, using proper tools, and knowing the smell of propane. Always perform a leak test after any work on the system. If you’re ever unsure about any aspect of the replacement process, do not hesitate to contact a qualified professional. Your safety, and the safety of those around you, is paramount.
Of course. Here is an expansion of the outlined section.
Understanding Your Propane Regulator: Function, Failure, and Fuel
Now that we’ve established the importance of a properly functioning propane regulator, let’s delve deeper into its inner workings and how it interacts with your propane system. Understanding the regulator’s purpose, recognizing the signs of failure, and knowing how to inspect your supply lines are all critical steps in ensuring a safe and efficient propane setup. This knowledge empowers you to maintain your system effectively and identify potential problems before they escalate.
What Exactly Is a Propane Regulator?
At its most basic, a propane regulator is a pressure-reducing valve. Its primary function is to take the high-pressure propane gas from the tank and reduce it to a lower, more consistent pressure that your appliances can safely use.
Think of it as a crucial intermediary in your propane system.
Without a regulator, the high pressure from the tank would overwhelm and potentially damage your appliances.
It converts high pressure to low pressure.
The regulator ensures a steady and safe flow of propane, allowing your appliances to operate efficiently and reliably.
Recognizing the Signs of a Failing Regulator
A malfunctioning propane regulator can manifest in several ways. Identifying these warning signs early can prevent more serious problems down the road. Here are some common indicators of a failing regulator:
-
Inconsistent Flame: If you notice that the flame on your propane appliances is fluctuating, sputtering, or unusually weak, it could indicate that the regulator isn’t providing a consistent gas flow.
-
Hissing Sounds: A hissing sound coming from the regulator itself can be a sign of a leak or internal damage. This requires immediate attention.
-
Pressure Fluctuations: Significant pressure drops or surges in your propane system can point to a regulator that is struggling to maintain a stable output.
-
Appliance Malfunctions: If your propane appliances are not operating correctly, even after you’ve checked other potential causes, a faulty regulator could be the culprit.
If you observe any of these signs, it’s crucial to investigate further and, if necessary, consider replacing the regulator.
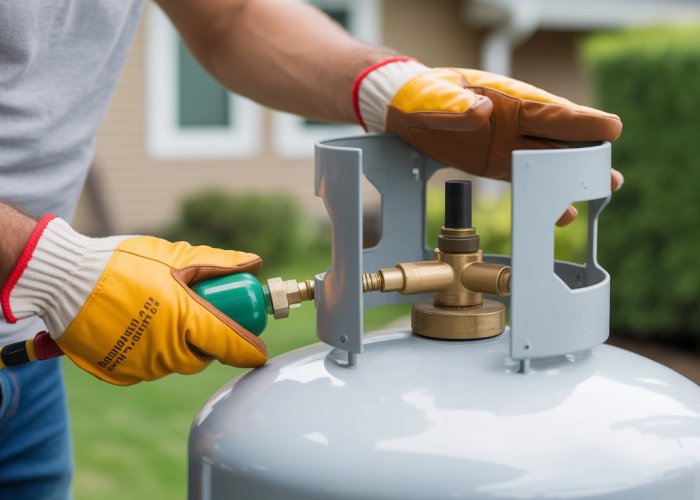
The Propane Regulator and the Propane Tank: A Vital Connection
The propane regulator is directly connected to the propane tank. This connection forms the starting point of your entire propane system. The regulator attaches to the tank valve.
This placement allows it to immediately control the flow of propane as it leaves the tank. The regulator’s performance is intrinsically linked to the tank’s condition and the pressure within it.
A properly functioning tank valve is essential for the regulator to operate correctly. Ensure that the tank valve is in good working order and free from any damage or leaks.
Inspecting Propane Supply Lines/Hoses for Damage
The propane supply lines or hoses are responsible for delivering the regulated propane from the regulator to your appliances. Regular inspection of these lines is critical for safety.
Here’s what to look for during an inspection:
-
Cracks or Abrasions: Carefully examine the hoses for any signs of cracking, wear, or abrasion. These can weaken the hose and lead to leaks.
-
Bulges or Swelling: Bulges or swelling in the hose can indicate that the material is degrading or that the hose is being subjected to excessive pressure.
-
Loose Connections: Check all connections between the hoses, regulator, and appliances to ensure they are tight and secure.
-
Rust or Corrosion: Look for signs of rust or corrosion on any metal fittings or connections.
-
The Smell of Propane: During and after inspection, be mindful of the distinctive smell of propane, which could signal a leak.
If you find any damage to the supply lines, replace them immediately. Use only propane-rated hoses that are specifically designed for use with propane systems.
Cost Breakdown: DIY vs. Professional Propane Regulator Replacement
Now that we’ve explored the vital role of the propane regulator and how to spot potential issues, let’s break down the financial implications of replacing it. Understanding the costs involved, whether you choose the DIY route or opt for professional installation, is crucial for making an informed decision. This section will dissect the various factors that contribute to the overall expense, enabling you to budget effectively and weigh your options carefully.
Factors Influencing Replacement Cost
Several key elements determine the final cost of replacing your propane regulator. These include the type of regulator required for your system, whether you choose to tackle the replacement yourself or hire a professional, and any additional parts that might be necessary to complete the job. Let’s examine each of these factors in detail.
Type of Propane Regulator
The type of propane regulator needed significantly impacts the overall cost. Different appliances and propane systems require different types of regulators.
First-stage regulators are designed to handle the high pressure directly from the propane tank, while second-stage regulators further reduce the pressure for specific appliances. High-pressure regulators and specialty regulators for RVs or other applications also exist. Each type carries a different price tag, with more complex or specialized regulators generally costing more.
Consider the regulator’s BTU (British Thermal Unit) rating, as this indicates its capacity. Ensure the replacement regulator has the appropriate BTU rating for your propane system to ensure optimal performance and safety.
DIY vs. Professional Installation
One of the most significant cost drivers is whether you choose to replace the regulator yourself (DIY) or hire a qualified professional. DIY replacement can save you money on labor costs. However, it requires a certain level of mechanical skill and a thorough understanding of propane systems.
Professional installation, on the other hand, guarantees the job is done correctly and safely, minimizing the risk of leaks or other hazards.
Home Labor: If you’re considering the DIY route, you’ll need to account for the time you spend on the project. Although you’re not paying yourself an hourly wage, your time has value. Consider how many hours the project will take, your comfort level with the task, and the potential cost of errors.
Additional Parts Needed
In some cases, replacing the propane regulator may necessitate replacing other components, such as fittings or propane supply lines (hoses). Old or damaged hoses can compromise the integrity of the system and should be replaced concurrently with the regulator.
Fittings may also need to be replaced if they are corroded or damaged. These additional parts will add to the overall cost, so it’s crucial to inspect your entire propane system before starting the replacement process.
Cost Range for a New Propane Regulator
The cost of a new propane regulator can vary widely depending on its type, brand, and features. Simple, low-pressure regulators can range from $20 to $50, while more complex, high-capacity regulators can cost $100 or more.
Consider purchasing from reputable brands known for their quality and reliability, even if they cost slightly more. Investing in a high-quality regulator can save you money in the long run by preventing future problems and ensuring safe operation.
Estimating the Cost of Home Labor (If Applicable)
As mentioned earlier, even DIY projects have a cost associated with them – your time. If you’re weighing the DIY option, consider how much your time is worth. While you’re not writing a check to yourself, those hours could be spent on other income-generating activities or simply enjoying your leisure time.
Factor in the time it will take to research the correct regulator, purchase the necessary tools and parts, complete the replacement, and test for leaks. Be honest with yourself about your skill level and the potential for complications. Underestimating the time commitment can lead to frustration and added expense.
Potential Savings with DIY Replacement
The primary advantage of DIY propane regulator replacement is the potential for significant cost savings. By eliminating labor costs, you can save hundreds of dollars compared to professional installation. However, it’s crucial to weigh these savings against the risks involved.
If you are not comfortable working with propane or lack the necessary skills, hiring a professional is always the safest option, regardless of the potential cost savings. The peace of mind knowing the job is done correctly and safely is often worth the investment.
Now that we’ve assessed the financial landscape of propane regulator replacement, from the cost of the regulator itself to potential labor expenses, it’s time to delve into the practical side of things. If you’ve decided that a DIY replacement is the right path for you, the following guide will provide a detailed breakdown of the process. However, remember that safety is paramount and knowing your limitations is key.
DIY Propane Regulator Replacement: A Step-by-Step Guide (Handle with Care!)
Replacing a propane regulator yourself can save you money, but it’s crucial to approach the task with the utmost caution and respect for safety protocols. This guide provides detailed instructions, but it’s not a substitute for professional expertise.
Safety First: A Crucial Disclaimer
Working with propane can be dangerous. If you are not comfortable with any of the steps outlined below, or if you have any doubts about your ability to safely complete the replacement, STOP.
Call a qualified HVAC technician or propane professional immediately. Your safety, and the safety of those around you, is not worth risking. Remember, a mistake could lead to a gas leak, fire, or explosion.
Consider these situations when DIY is strongly discouraged:
- You smell propane before starting the work.
- You have never worked with propane systems before.
- Your existing system is corroded or damaged beyond a simple regulator replacement.
- You lack the proper tools.
- You feel unsure or uncomfortable at any point in the process.
Essential Tools for the Job
Before you begin, gather all the necessary tools to ensure a smooth and safe replacement. Having the right tools readily available will minimize delays and potential hazards.
Here’s a checklist of essential tools:
- New Propane Regulator: Ensure it’s the correct type and BTU rating for your system.
- Pipe Wrenches (2): For loosening and tightening connections.
- Leak Detection Solution: A commercially available leak detection solution or a mixture of soap and water in a spray bottle.
- Adjustable Wrench: For various fittings.
- Screwdrivers (various sizes): Both flathead and Phillips head, depending on your system.
- Gloves: To protect your hands.
- Safety Glasses: To protect your eyes.
- Gas Detector (Optional): For added leak detection assurance.
- Thread Sealant Tape (Teflon Tape): For sealing threaded connections.
Detailed Instructions: Step-by-Step Replacement
Follow these instructions carefully and methodically. If you encounter any unexpected issues, consult a professional.
Step 1: Shutting Off the Propane Tank
This is the most critical step. Ensure the propane tank valve is completely closed before proceeding. Turn the valve clockwise until it stops. Double-check that it is fully closed.
Step 2: Disconnecting the Old Propane Regulator
-
Locate the Regulator: Identify the propane regulator connected to your propane tank or system.
-
Loosen the Connections: Using two pipe wrenches, one to hold the regulator and the other to loosen the connection to the tank, carefully loosen the fittings connecting the old regulator. Be prepared for a slight release of pressure.
-
Disconnect the Regulator: Once the connections are loose, carefully disconnect the old regulator from the tank and any connected supply lines.
-
Inspect the Fittings: Examine the threads on the tank valve and supply lines for any damage or corrosion. Clean the threads thoroughly. Replace any damaged fittings.
Step 3: Connecting the New Propane Regulator
-
Apply Thread Sealant: Wrap Teflon tape clockwise around the threads of the new regulator’s inlet and outlet fittings. This will help ensure a gas-tight seal.
-
Connect to the Tank: Carefully align the new regulator with the tank valve and hand-tighten the connection.
-
Tighten the Connection: Use two pipe wrenches to tighten the connection securely. Avoid overtightening, which could damage the threads.
-
Connect Supply Lines: Connect any supply lines to the outlet of the new regulator, using Teflon tape on the threads and tightening securely with wrenches.
Step 4: Checking for Leaks (Leak Detection)
-
Prepare Leak Detection Solution: Mix a solution of soap and water in a spray bottle, or use a commercially available leak detection solution.
-
Apply the Solution: Spray the solution liberally on all connections, including the tank valve connection, the regulator inlet and outlet fittings, and any supply line connections.
-
Observe for Bubbles: Watch carefully for any bubbles forming in the solution. Bubbles indicate a gas leak.
-
If Leaks are Detected: If you detect a leak, immediately shut off the propane tank valve. Tighten the leaking connection slightly and reapply the leak detection solution. If the leak persists, DO NOT continue. Call a qualified professional.
-
Using a Gas Detector (Optional): For added assurance, use a gas detector to check for propane leaks around all connections. Follow the manufacturer’s instructions for the gas detector.
Reinforcing Safety Precautions
Throughout the entire process, remember the following safety precautions:
-
Work in a Well-Ventilated Area: Ensure adequate ventilation to prevent propane accumulation.
-
No Open Flames or Sparks: Keep open flames, sparks, and any potential ignition sources away from the work area.
-
Use Proper Tools: Use the correct tools for the job to avoid damaging connections or causing leaks.
-
Know the Smell of Propane: Propane has a distinctive odor. If you smell propane at any time, shut off the tank valve immediately and evacuate the area. Call your propane supplier or fire department from a safe location.
-
Double-Check All Connections: Before turning the propane tank back on, double-check that all connections are tight and secure.
By following these steps carefully and prioritizing safety, you can potentially save money by replacing your propane regulator yourself. However, remember that professional assistance is always available and should be sought when in doubt.
Now that we’ve assessed the financial landscape of propane regulator replacement, from the cost of the regulator itself to potential labor expenses, it’s time to delve into the practical side of things. If you’ve decided that a DIY replacement is the right path for you, the following guide will provide a detailed breakdown of the process. However, remember that safety is paramount and knowing your limitations is key.
When to Call a Professional: Recognizing Your Limits
While the prospect of saving money with a DIY propane regulator replacement is appealing, it’s crucial to acknowledge when the job is best left to a qualified professional. Your safety, and the safety of those around you, should always be the top priority. This section outlines scenarios where attempting a DIY replacement could be risky and emphasizes the advantages of enlisting the expertise of HVAC technicians or other certified professionals.
Red Flags: Signs You Shouldn’t DIY
There are several clear indicators that should dissuade you from attempting a DIY propane regulator replacement. Recognizing these "red flags" can prevent potential accidents and ensure the job is done correctly and safely.
- The Smell of Propane: If you detect the distinct odor of propane before even starting the work, do not proceed. This suggests a leak, and you should immediately evacuate the area and contact your propane supplier or fire department.
- Lack of Experience: Working with propane systems requires a basic understanding of plumbing and gas connections. If you’ve never worked with propane before, or if you are uncomfortable with any of the steps involved, it’s best to call a professional.
- Corrosion or Damage: If the existing propane system, particularly the pipes, fittings, or the tank itself, shows signs of significant corrosion, rust, or physical damage, do not attempt a regulator replacement. These issues can complicate the process and require specialized repairs.
- Inadequate Tools: Having the right tools is essential for any DIY project. If you lack the necessary tools (e.g., pipe wrenches, leak detection solution, thread sealant), or if your tools are not in good condition, it’s safer to hire a professional. Makeshift solutions can compromise safety and the integrity of the connections.
- Uncertainty or Discomfort: If, at any point during the process, you feel unsure, uncomfortable, or overwhelmed, stop immediately and seek professional assistance. Trust your instincts; it’s better to be safe than sorry.
The Benefits of Hiring a Professional
Engaging a qualified HVAC technician or propane professional offers numerous advantages beyond just avoiding potential hazards. Their expertise can save you time, money, and stress in the long run.
- Expertise and Experience: Licensed professionals possess the knowledge, skills, and experience to handle propane system repairs and replacements safely and efficiently. They are trained to identify potential issues and address them correctly.
- Proper Tools and Equipment: Professionals have access to specialized tools and equipment that are necessary for working with propane systems, ensuring accurate and safe installations.
- Code Compliance: Professionals are familiar with local building codes and regulations related to propane systems. They can ensure that the replacement is done in compliance with these codes, avoiding potential fines or safety violations.
- Warranty and Insurance: Reputable professionals typically offer warranties on their work, providing peace of mind in case of future problems. They also carry liability insurance, protecting you from financial responsibility in the event of an accident.
- Leak Detection and System Check: After replacing the regulator, a professional will perform a thorough leak test and inspect the entire propane system for any other potential issues, ensuring its overall safety and efficiency.
Questions to Ask Before Hiring
Before hiring a propane professional, it’s essential to ask the right questions to ensure you’re getting a qualified and reliable technician.
- Are you licensed and insured? Always verify that the technician has the necessary licenses and insurance coverage to perform propane work in your area.
- What is your experience with propane regulator replacements? Ask about their experience with similar types of regulators and systems.
- Do you offer a warranty on your work? Inquire about the terms of the warranty and what it covers.
- Can you provide references from previous customers? Contacting previous customers can give you valuable insights into the technician’s quality of work and customer service.
- What is your estimated cost for the replacement, including labor and parts? Obtain a detailed estimate in writing, outlining all costs involved.
Understanding Professional Costs
The cost of hiring a professional to replace a propane regulator can vary depending on several factors, including your location, the type of regulator, and the complexity of the job.
- Labor Costs: Labor costs typically range from $75 to $150 per hour, depending on the technician’s experience and location. The time required for the replacement can vary depending on the accessibility of the regulator and any unforeseen complications.
- Parts Costs: The cost of the regulator itself can range from $50 to $200 or more, depending on the type and brand.
- Additional Costs: Additional costs may include travel fees, permits (if required), and the cost of any additional parts or repairs that may be needed.
It’s essential to obtain a detailed estimate from the professional before proceeding with the replacement. This will help you understand the total cost involved and avoid any surprises. While professional installation may seem more expensive upfront, the peace of mind, safety, and expertise they provide are invaluable.
Now that we’ve equipped ourselves with the knowledge of when to seek expert assistance, let’s shift our focus to the bedrock of any propane endeavor: safety. Even seemingly minor tasks involving propane demand the utmost respect and adherence to established safety protocols.
Safety First: Essential Precautions for Propane Systems
Propane, while a versatile and efficient energy source, requires careful handling. A commitment to safety isn’t merely a recommendation; it’s the cornerstone of responsible propane usage. This section provides a comprehensive checklist of essential precautions, leak detection strategies, and emergency protocols to ensure your safety and the well-being of those around you.
Your Propane Safety Checklist
Before undertaking any work involving propane, review and diligently follow this checklist:
- Ventilation is Key:
Always work in a well-ventilated area. Propane is heavier than air and can accumulate in low-lying areas, creating a potentially hazardous environment.
Ensure adequate airflow to prevent buildup. - No Open Flames or Sparks:
This is paramount. Propane is highly flammable, and even a small spark can ignite a leak.
Absolutely avoid smoking, open flames, and any tools that could generate sparks in the vicinity of your propane system. - Use the Right Tools:
Employ only tools that are specifically designed for working with gas lines and fittings.
Using incorrect tools can damage connections, leading to leaks. This includes using pipe dope or Teflon tape resistant to propane. - Know the Smell of Propane:
Propane manufacturers add an odorant (usually Mercaptan) to give it a distinct, easily recognizable smell, often described as rotten eggs or skunk-like.
Familiarize yourself with this smell. If you detect it, immediately evacuate the area and call your propane supplier or fire department. Don’t assume someone else will report it.
Leak Detection: A Crucial Step
After any installation or repair involving propane connections, meticulous leak testing is mandatory. Here’s how:
- Soapy Water Test:
Mix a solution of soap and water (dish soap works well). - Apply the Solution:
Apply the soapy solution to all connections, fittings, and joints. - Watch for Bubbles:
Carefully observe for any bubbles forming. Bubbles indicate a leak. - Tighten or Reconnect:
If you find a leak, carefully tighten the connection or disconnect and reassemble it, ensuring proper alignment and thread engagement. - Re-test:
After tightening or reassembling, reapply the soapy solution and check again for leaks. Repeat as necessary. - Gas Detector (Optional):
For enhanced leak detection, consider using a handheld gas detector. These devices can detect even minute leaks that may not be visible with the soapy water test.
Emergency Procedures: Reacting to a Leak
Knowing how to respond in the event of a propane leak is crucial. Here are the essential steps:
- Evacuate Immediately:
If you suspect a propane leak, do not hesitate. Evacuate everyone from the area immediately. - No Sparks or Flames:
As you evacuate, do not operate any electrical switches, use cell phones, or create any source of ignition. - Shut Off the Source (If Safe):
If it is safe to do so, shut off the main propane tank valve. - Call for Help:
From a safe distance, call your propane supplier or the fire department. Do not re-enter the building until they have given the all-clear. - Seek Medical Attention:
If anyone experiences symptoms of propane exposure (headache, dizziness, nausea), seek immediate medical attention. - Report the Incident:
Even if the leak seems minor, report it to your propane supplier. They can inspect your system for any underlying issues.
Propane Regulator Fix: FAQs
These FAQs cover common questions about propane regulator issues, repair costs, and DIY troubleshooting.
How do I know if my propane regulator is failing?
Common signs include inconsistent flame height on appliances, hissing sounds near the regulator, or a complete lack of propane flow even with a full tank. A yellow or orange flame instead of blue can also indicate a problem.
Is it safe to try to fix a propane regulator myself?
Simple troubleshooting like checking for obstructions is generally safe. However, disassembly and internal repairs are best left to qualified professionals due to the risk of leaks and explosions. Always prioritize safety.
How much does it cost to replace a propane regulator?
The cost to replace a propane regulator can vary. Professionally installed, it can range from $100 to $300 or more depending on the regulator type and labor costs. The cost to replace a propane regulator for home labor is significantly less, potentially just the cost of the regulator itself (typically $20-$80), but requires careful attention to safety and proper installation.
What happens if I ignore a faulty propane regulator?
Ignoring a faulty regulator can lead to serious safety hazards. It can cause gas leaks, appliance malfunction, and potentially fires or explosions. Prompt repair or replacement is crucial to ensure safe operation of your propane system.
So, there you have it – all you need to know about the cost to replace a propane regulator for home labor. Hope this helped, and good luck with your project!