Is your cabinet door drooping, causing you frustration? Blum hinges, known for their precision engineering, sometimes require blum overhead hinges adjustment to maintain proper alignment. This article provides a straightforward guide on how to tackle sagging doors using readily available tools like a screwdriver. Correct adjustment can also extend the lifespan of your kitchen cabinet. Follow these simple steps to restore your cabinet doors to their original glory, ensuring smooth operation and a visually appealing finish.
Blum Hinge Adjustment: Fix Sagging Doors Now! (Easy)
If your cabinet doors are sagging, misaligned, or simply not closing properly, don’t despair! Often, the solution is a simple adjustment to your Blum hinges. This guide will walk you through everything you need to know, with a focus on Blum overhead hinges adjustment.
Understanding Blum Hinges and Why They Need Adjustment
What are Blum Hinges?
Blum hinges are a popular brand of hinges often used in kitchen and bathroom cabinets due to their durability and adjustability. They come in various types, but they all share the ability to be tweaked to ensure a perfect door fit.
Why Do Doors Sag and Need Adjustment?
Over time, cabinet doors can sag or become misaligned for several reasons:
- Weight: Heavy doors can put stress on the hinges, causing them to loosen.
- Humidity: Changes in humidity can cause wood to swell or shrink, affecting alignment.
- Wear and Tear: Frequent use naturally loosens screws and components.
- Improper Installation: If the hinges weren’t installed perfectly straight initially, issues will arise sooner.
Identifying the Blum Hinge Type
Before you start adjusting, it’s crucial to identify the type of Blum hinge you’re working with. While many adjustments are similar across models, knowing your hinge type can help you find specific instructions if needed.
- Look for Markings: Blum hinges usually have the Blum logo and a part number stamped on them.
- Check Online: You can search for the part number online to identify the exact hinge type and find diagrams.
- Take a Picture: Compare your hinge to images of Blum hinges online. Pay close attention to the adjustment screws and their locations.
Tools You’ll Need
Gather these tools before you begin:
- Screwdriver: Typically a Phillips head screwdriver. A magnetic screwdriver is helpful.
- Optional: Power Drill with Screwdriver Bits: Can speed up the process, but be careful not to overtighten.
- Level: To ensure doors are perfectly aligned vertically.
- Pencil: For marking adjustments.
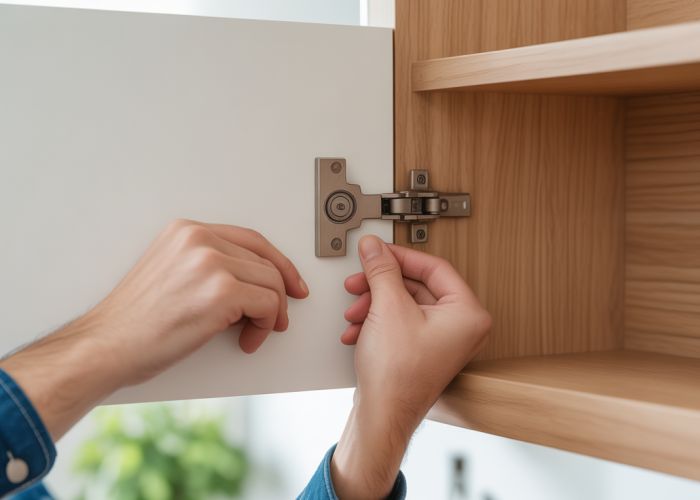
How to Adjust Blum Overhead Hinges
The adjustments for Blum overhead hinges typically address three key areas: side-to-side, in-and-out (depth), and up-and-down.
Side-to-Side Adjustment
This adjustment moves the door left or right, relative to the cabinet frame. It’s useful for correcting gaps or overlaps between doors.
- Locate the Side-to-Side Adjustment Screw: This screw is usually located on the hinge arm, near where it connects to the cabinet frame.
- Loosen the Screw: Turn the screw slightly to loosen it. Don’t remove it completely.
- Adjust the Door: Gently push or pull the door horizontally until it’s properly aligned.
- Tighten the Screw: Secure the adjustment by tightening the screw. Check the alignment and readjust if necessary.
In-and-Out (Depth) Adjustment
This adjustment moves the door closer to or further away from the cabinet frame. It corrects doors that are sticking out too far or are recessed too deeply.
- Locate the Depth Adjustment Screw: This screw is typically found on the hinge cup, which is the part of the hinge that sits inside the door.
- Turn the Screw: Rotating the screw clockwise moves the door outward; counter-clockwise moves it inward. Make small adjustments and check the door alignment after each adjustment.
- Check the Alignment: Ensure the door is flush with the surrounding doors or the cabinet frame.
Up-and-Down Adjustment
This adjustment raises or lowers the door. It’s helpful for correcting doors that are not level with each other or the cabinet frame. Some Blum hinges use a different mechanism for vertical adjustment, so look closely at your particular hinge model.
- Loosen Mounting Screws: Very slightly loosen the screws that attach the hinge plate to the cabinet frame. Do not remove them. Just loosen them enough so that you can gently shift the hinge vertically.
- Adjust the Door Vertically: Gently shift the door up or down as needed. Use a level to ensure the top of the door is aligned with other doors or the cabinet frame.
- Retighten the Screws: Once the door is in the correct position, carefully retighten the mounting screws. Make sure the door doesn’t shift during this process.
- Alternative Method: Some Blum hinges have an eccentric cam or screw for vertical adjustment. If yours does, locate this cam and turn it to adjust the door’s height.
Troubleshooting Common Problems
Here’s a simple table to guide troubleshooting.
| Problem | Possible Cause | Solution |
|---|---|---|
| Door still sags after adjustment | Screws are stripped | Replace the screws with slightly longer or wider screws. If the wood is damaged, use wood glue and dowels to repair. |
| Hinge is damaged or broken | Hinge is faulty or has been damaged. | Replace the entire hinge. |
| Door rubs against the cabinet frame | Incorrect depth adjustment. | Adjust the depth screw to move the door further away from the frame. |
| Doors are not closing properly | Incorrect side-to-side or depth adjustment. | Carefully adjust both screws to achieve proper alignment. |
| Screws constantly loosen | Worn screw holes. | Use wood glue and toothpicks or dowels to reinforce the screw holes before reinserting the screws. |
Important Tips for Success
- Small Adjustments: Make small adjustments at a time. It’s easier to correct over-adjustment than to guess the right amount from the start.
- Check Multiple Hinges: If a door has multiple hinges, you may need to adjust all of them slightly to achieve the best results.
- Don’t Overtighten: Overtightening screws can strip them or damage the cabinet frame or door. Tighten until snug, but not excessively.
- Take Pictures: Before you start adjusting, take pictures of the hinge positions. This can be helpful if you get lost during the process.
- Consult a Professional: If you’re uncomfortable making adjustments or if the problem persists, consider consulting a professional cabinet installer.
FAQs: Blum Hinge Adjustment – Fix Sagging Doors Now!
Hopefully, the article cleared up how easy it is to adjust Blum hinges. Here are some frequently asked questions to further assist you.
What type of Blum hinges does this adjustment process work for?
This process primarily applies to Blum hinges commonly found on kitchen and cabinet doors. While the specific adjustment mechanisms might vary slightly between models, the general principles remain the same. This guide should work for many models including blum overhead hinges adjustment.
Which adjustment screw do I turn to fix a door that’s sagging downwards?
For a sagging door, focus on the vertical adjustment screw. Turning it one way will raise the door, and the opposite direction will lower it. Make small adjustments and check the door’s alignment after each turn.
How do I prevent over-tightening the adjustment screws?
Be gentle when making adjustments. If you feel resistance, stop turning the screw. Over-tightening can damage the hinge or strip the screw head. It’s always better to make small, incremental adjustments. Proper blum overhead hinges adjustment is gentle.
Can I adjust Blum hinges if the screws are stripped?
If the screws are stripped, adjustment becomes difficult. You may need to replace the entire hinge. Try using a screw extractor if the screw head is accessible. If you can’t extract the stripped screw, replacing the hinge is the best option.
So, there you have it! Hopefully, you’ve got your cabinet doors swinging smoothly again after that blum overhead hinges adjustment. Go ahead and pat yourself on the back – you’re a DIY superstar! Now go enjoy those perfectly aligned doors!