Mastering isometric circle drawing often begins with understanding its fundamental relationship to ellipses, which act as the projected representation of circles in this specific graphical projection. Engineering design frequently relies on this technique for creating clear, understandable representations. A precise understanding of the isometric circle drawing process is crucial for effective communication in technical drawings. This detailed technique is often taught and refined using tools from companies like Faber-Castell, demonstrating the practical application of isometric circle drawing in professional environments. Learning from experts, such as those who contribute to resources like Instructables, can greatly enhance your ability to perform isometric circle drawing.
Mastering Isometric Circle Drawing: The Only Guide You Need – Article Layout
This article aims to be the definitive guide to isometric circle drawing. The layout will be structured to progressively build understanding, from fundamental concepts to practical application. Emphasis will be placed on clarity and step-by-step instructions, optimizing for users searching for "isometric circle drawing" information.
1. Introduction: What is an Isometric Circle?
- Paragraph 1: Briefly define isometric projection and its purpose, highlighting its use in visualizing 3D objects in 2D. Introduce the concept that circles appear as ellipses in isometric views. Explain why understanding "isometric circle drawing" is crucial for technical drawings and 3D representations.
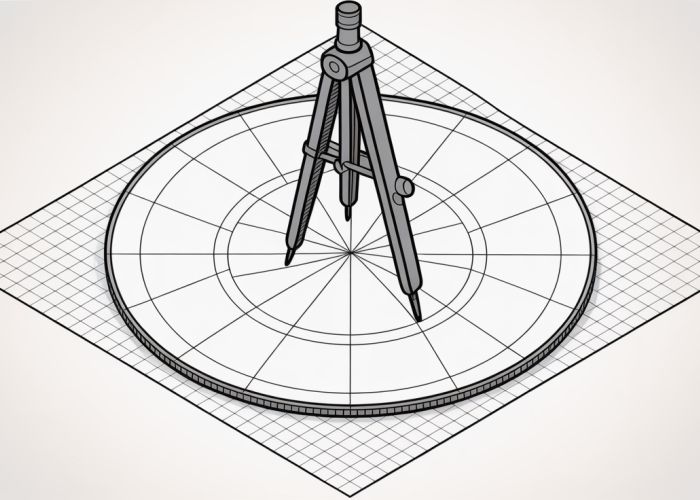
- Paragraph 2: State the article’s purpose: to provide a comprehensive guide to drawing isometric circles accurately. Briefly mention the tools needed (e.g., compass, ruler, isometric grid paper – optional but helpful).
2. Understanding Isometric Axes and Planes
- Paragraph 1: Explain the concept of isometric axes. The standard isometric axes are 120 degrees apart. Visual aids (diagrams) are essential here.
- Paragraph 2: Define the three isometric planes (XY, XZ, and YZ). Explain how each plane is defined by two of the isometric axes. Visual aids showing these planes on a simple isometric cube are very important.
3. The Ellipse: An Isometric Circle’s True Form
- Paragraph 1: Clearly state that a circle projected onto an isometric plane appears as an ellipse.
- Paragraph 2: Explain the key parameters of an ellipse:
- Major Axis: The longest diameter of the ellipse.
- Minor Axis: The shortest diameter of the ellipse.
- Center Point: The point where the major and minor axes intersect.
- Paragraph 3: Explain how the major and minor axes relate to the original circle’s diameter in an isometric view. This is crucial for understanding the proportions of the ellipse.
4. Methods for Isometric Circle Drawing
- Paragraph 1: Introduce the common methods for drawing isometric circles. We will cover the "Four-Center Method" and the "Compass Method (using an isometric ellipse template)."
-
Paragraph 2: Briefly describe each method, setting the stage for detailed instructions.
4.1. The Four-Center Method
- Paragraph 1: Explain that the Four-Center Method is an approximation technique using arcs drawn from four different center points to create an ellipse.
- Step-by-Step Instructions (Numbered List):
- Draw the Isometric Square: Start by drawing an isometric square with sides equal to the diameter of the circle you want to represent. Ensure the square is aligned with the chosen isometric plane. Provide an illustrative image.
- Locate the Midpoints: Find the midpoints of each side of the isometric square. Mark these points clearly. Image required.
- Find the Center Points: Draw lines connecting the midpoints of opposite sides of the square. Where these lines intersect the corners of the square are your center points for drawing the arcs. Provide an illustrative image highlighting the center points.
- Draw the Arcs: Using a compass, place the point on one of the center points. Draw an arc that extends from the midpoint to the adjacent corner of the square. Repeat for the other three center points. Image illustrating arc creation.
- Refine the Ellipse: If necessary, refine the ellipse by adjusting the arcs to create a smoother curve.
- Paragraph 2: Discuss the advantages and disadvantages of the Four-Center Method:
- Advantages: Simple, doesn’t require specialized tools.
- Disadvantages: Not a perfect ellipse, can appear slightly angular.
4.2. The Compass Method (Using an Isometric Ellipse Template)
- Paragraph 1: Explain the advantage of using an isometric ellipse template: it provides accurate ellipses for various isometric angles.
- Step-by-Step Instructions (Numbered List):
- Select the Correct Template: Choose an ellipse template with the appropriate isometric angle (usually 35.3 degrees). Also, select the correct ellipse size that matches the intended diameter of your circle in the isometric view.
- Position the Template: Align the center lines of the template with the center point of your desired isometric circle on your drawing. Make sure the template is accurately aligned with the isometric plane.
- Trace the Ellipse: Carefully trace around the inside of the ellipse template using a sharp pencil or pen.
- Paragraph 2: Advantages and disadvantages:
- Advantages: Accurate ellipses, professional-looking results.
- Disadvantages: Requires purchasing a template set.
5. Choosing the Right Plane
- Paragraph 1: Emphasize the importance of selecting the correct isometric plane for your circle.
- Paragraph 2: Explain how the orientation of the ellipse (major and minor axes) changes depending on which isometric plane it’s drawn on. Use visual examples showing the same circle drawn on all three isometric planes (XY, XZ, YZ). Use descriptive labels such as "Isometric Circle on XY Plane," "Isometric Circle on XZ Plane," and "Isometric Circle on YZ Plane."
6. Applying Isometric Circles to 3D Objects
- Paragraph 1: Provide practical examples of how to use isometric circles in drawings of 3D objects.
- Examples (Numbered List):
- Drawing a Cylinder: Show how to draw the top and bottom faces of a cylinder using isometric ellipses. Explain how to connect the ellipses with straight lines to complete the cylinder. Use a clear diagram.
- Drawing a Hole: Demonstrate how to draw a hole through a 3D object using concentric isometric ellipses. Visual representation is key.
- Drawing a Sphere: Explain how spheres are represented as circles in isometric views, but the positioning is key. Showing the center point is important to visualize the 3D center of the sphere.
- Combining Circles and Shapes: Complex models using a mixture of simple shapes (i.e., a wheel on an axle).
7. Troubleshooting Common Issues
- Paragraph 1: Address common problems encountered when drawing isometric circles.
- Common Issues (Bullet Points):
- Ellipse Looks Distorted: Ensure the isometric square is drawn accurately and that the center points are correctly located.
- Arcs Don’t Connect Smoothly: Double-check the compass placement and adjust the arcs to create a smoother transition.
- Choosing the Wrong Plane: Review the section on isometric planes and ensure the ellipse is oriented correctly for the desired face of the object.
- Inconsistent Diameters: Make sure the circle’s diameter is the same throughout the isometric drawing, ensuring accurate proportions.
8. Tips and Tricks for Success
- Paragraph 1: Share helpful tips to improve isometric circle drawing skills.
- Tips (Bullet Points):
- Practice Regularly: Consistent practice is essential for mastering the techniques.
- Use Light Guidelines: Draw guidelines lightly to easily erase them later.
- Use Isometric Grid Paper: Isometric grid paper can assist in accurately drawing isometric lines and shapes.
- Take Your Time: Accuracy is more important than speed.
- Rotate your paper: Sometimes, rotating your paper can help you get a better drawing angle for the circle.
9. Advanced Techniques (Optional)
- Paragraph 1: Introduce more advanced concepts related to isometric circles (This section can be excluded to shorten the length if needed).
- Paragraph 2: Non-Standard Isometric Views
- Paragraph 3: Combining Multiple Isometric Views in One Diagram.
Mastering Isometric Circle Drawing: FAQs
Here are some frequently asked questions about drawing isometric circles, designed to help you master the technique and troubleshoot common issues.
What’s the difference between an isometric circle and a regular circle?
An isometric circle appears as an ellipse because it’s a circle viewed at an angle. In isometric projection, all three axes are equally foreshortened. To correctly draw an isometric circle drawing, you need to construct an isometric square first, then inscribe an ellipse within it.
Why is it important to use an isometric grid for drawing isometric circles?
An isometric grid helps maintain accuracy and proportion. The grid provides a visual guide for creating the isometric square within which the ellipse (isometric circle) is drawn. This ensures that the circle appears correctly foreshortened and aligns with the isometric perspective.
What if my isometric circle looks squashed or distorted?
A squashed or distorted isometric circle often indicates an error in constructing the isometric square or in drawing the ellipse itself. Double-check the measurements of your isometric square to ensure accuracy and use a compass to ensure the isometric circle drawing is evenly curved.
Can I use a circle stencil to draw isometric circles?
While a circle stencil can be a starting point, you’ll need to modify it to create an ellipse that fits within the isometric square. Using a stencil alone will not create a true isometric representation of a circle. The process of properly constructing the isometric square and then sketching the ellipse is crucial for an accurate isomethric circle drawing.
So, there you have it! Hopefully, this guide helps you nail your isometric circle drawing. Now go get creative and build something awesome!