Achieving a smooth wall surface often starts with precise plaster removing and chiping. The condition of your trowel, a key tool, directly impacts the final finish. Old homes, often featuring fragile plaster, demand extra care during this process, making techniques advocated by heritage restoration groups vital for preservation. Dust control also plays a crucial role, as minimizing airborne particles is essential for a clean and healthy work environment when it comes to plaster removing and chiping.
Plaster Perfect! A DIY Guide to Removing Plaster Without Chipping
This guide provides a step-by-step approach to safely and effectively removing plaster without causing unwanted chipping or damage to the underlying surface. We will focus on techniques to minimize "plaster removing and chipping," providing practical advice and tips for a successful DIY project.
Understanding the Challenges of Plaster Removal
Before diving into the removal process, it’s crucial to understand why plaster tends to chip. Several factors contribute:
- Age of the Plaster: Older plaster often becomes brittle and loses its bond with the lath (wooden strips that support the plaster).
- Moisture Exposure: Dampness weakens the plaster, making it prone to crumbling.
- Incorrect Tools: Using the wrong tools or applying excessive force can lead to chipping and cracking.
- Aggressive Removal Techniques: Rushing the process and using brute force will almost certainly result in damage.
Preparing for the Plaster Removal Process
Proper preparation is key to minimizing "plaster removing and chipping." This section outlines the essential steps to take before you begin.
Gathering Your Tools and Materials
Having the right tools will significantly improve your chances of success. Here’s a list of essential items:
- Safety Gear:
- Safety glasses: To protect your eyes from flying debris.
- Dust mask or respirator: Plaster dust can be harmful to your lungs.
- Gloves: To protect your hands from sharp edges and irritation.
- Tools:
- Utility knife: For scoring the plaster.
- Hammer: For gentle tapping.
- Chisel or pry bar: For carefully prying away sections of plaster. A wide, flat chisel is preferred.
- Putty knife: For scraping away loose debris.
- Dust sheets or plastic sheeting: To protect your floors and furniture.
- Buckets or trash bags: For disposing of the plaster debris.
- Spray bottle with water: For dampening the plaster (optional).
- Optional Tools:
- Oscillating multi-tool with a scraper blade: This can be very effective for removing plaster, but use it with caution and finesse.
- Shop vacuum with HEPA filter: For efficient dust removal.
Protecting Your Work Area
Contain the mess by properly protecting your work area:
- Cover Floors and Furniture: Lay down dust sheets or plastic sheeting, securing them with tape.
- Seal Off Adjoining Rooms: Use plastic sheeting and tape to create a barrier, preventing dust from spreading throughout the house.
- Ventilate the Area: Open windows and doors to improve airflow while wearing your dust mask.
Assessing the Plaster
Carefully inspect the plaster to identify any weak spots or areas that are already loose. This will help you determine the best approach for removal.
The Plaster Removal Process: Step-by-Step
This section provides a detailed guide on removing plaster safely and effectively, minimizing "plaster removing and chipping."
Scoring the Plaster
- Use a utility knife to score the plaster into manageable sections. Aim for sections that are approximately 12 inches by 12 inches.
- Scoring helps to control the breaking points and prevents large chunks of plaster from falling uncontrollably. This is a critical step to prevent chipping.
Dampening the Plaster (Optional)
- Lightly dampen the plaster with water using a spray bottle. Avoid soaking the plaster, as this can damage the underlying lath.
- Dampening can soften the plaster and make it easier to remove, but it’s not always necessary. Proceed with caution.
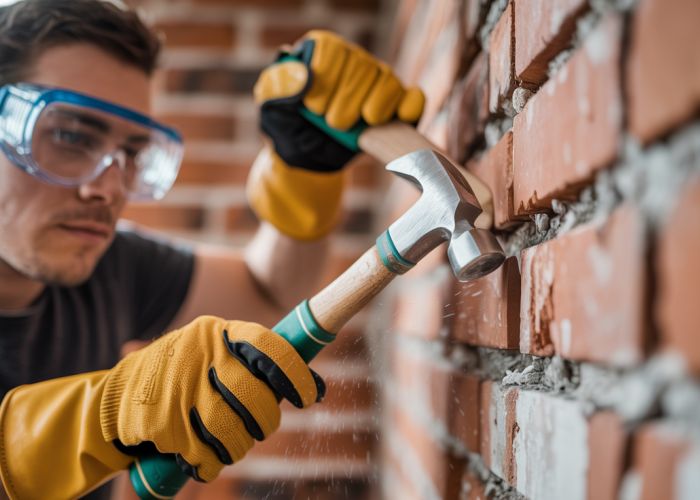
Removing the Plaster
- Begin by gently tapping the plaster with a hammer near the scored lines. This will help to loosen the plaster from the lath.
- Use a chisel or pry bar to carefully pry away sections of plaster. Work slowly and deliberately, avoiding excessive force. Insert the chisel between the plaster and the lath, and gently lever the plaster away.
- If you encounter resistance, try tapping the chisel with the hammer to help it penetrate the plaster.
- For stubborn areas, consider using an oscillating multi-tool with a scraper blade. Use a low setting and move the tool slowly and deliberately.
- As you remove the plaster, be careful to avoid damaging the lath. If the lath is damaged, it may need to be repaired or replaced.
Cleaning Up the Debris
- Regularly remove the plaster debris from your work area. This will help to prevent accidents and keep the area clean.
- Use a shop vacuum with a HEPA filter to remove dust from the floor and walls.
- Dispose of the plaster debris properly in accordance with local regulations.
Troubleshooting Common Problems
| Problem | Possible Cause | Solution |
|---|---|---|
| Excessive Chipping | Brittle plaster, excessive force, blunt tools | Use sharper tools, apply less force, dampen the plaster (if appropriate), work more slowly. |
| Lath Damage | Excessive force, incorrect tool placement | Use a wider chisel, avoid prying directly against the lath, work more carefully. |
| Plaster Not Releasing Easily | Strong bond, dry plaster | Dampen the plaster, try scoring more deeply, use an oscillating multi-tool for stubborn areas. |
| Dust and Debris Spreading | Inadequate protection, poor ventilation | Improve the sealing of the work area, increase ventilation, use a shop vacuum frequently. |
Plaster Perfect! Removing Plaster Without Chipping: Your Questions Answered
Here are some frequently asked questions to help you achieve a flawless plaster removing project without damaging your walls.
What’s the most common reason for plaster chipping during removal?
The most common cause is attempting to force the plaster off without properly weakening its bond to the lath or wall beneath. Using excessive force increases the likelihood of chunks of plaster removing and chiping away, damaging the surface.
Do I really need to score the plaster before trying to remove it?
Yes, scoring the plaster creates defined sections and helps to control the break points. This minimizes the transfer of force to adjacent areas, which dramatically reduces the risk of uncontrolled plaster removing and chiping, especially around edges and corners.
What kind of tools are best for removing plaster without causing damage?
A combination of tools works best. A utility knife for scoring, a small pry bar or chisel for prying away sections, and a hammer for gently tapping the chisel are all helpful. Avoid using excessive force with any tool to prevent plaster removing and chiping.
Is there a way to protect the surrounding areas from dust and debris during plaster removing?
Absolutely. Covering nearby furniture with drop cloths and sealing doorways with plastic sheeting is crucial. Wearing a mask and eye protection is also recommended to protect yourself from dust and flying debris during the plaster removing and chiping process.
So, there you have it! Hopefully, these tips help you tackle your next plaster removing and chiping project without any major headaches. Good luck, and happy plastering!