For embedded systems and audio enthusiasts, achieving high-fidelity sound output is paramount. PulseAudio, a widely used sound server, offers robust audio management capabilities, making it suitable for complex setups. I2S (Inter-IC Sound), a serial bus interface standard, enables digital audio data transfer between integrated circuits. Leveraging Linux’s ALSA (Advanced Linux Sound Architecture) provides a low-level interface to audio hardware, allowing precise control. Understanding how to configure Raspberry Pi, a popular platform for audio projects, to utilize PulseAudio with I2S is essential for optimal performance. Configuring pulseaudio with i2s effectively results in a high-quality audio experience. This guide will take you through a step-by-step approach to configuring Pulseaudio with I2S for a superior audio setup.
Crafting the Ideal Article Layout: Pulseaudio & I2S (Step-by-Step)
This document outlines the optimal structure and content organization for an article focused on configuring "pulseaudio with i2s." The layout is designed to guide readers through the process effectively, ensuring clarity and ease of understanding.
I. Introduction: Setting the Stage
-
Headline Optimization: The headline should include the main keyword phrase ("pulseaudio with i2s") and clearly convey the article’s purpose. Variations like "Improve Audio Quality: Configuring Pulseaudio with I2S" or "Step-by-Step: Achieving Optimal Audio with Pulseaudio and I2S" are also effective.
-
Introductory Paragraph: Clearly define I2S and Pulseaudio, briefly explaining their individual roles in the audio processing chain. Emphasize the benefits of combining them – improved audio quality, lower latency (if applicable), and enhanced control. This section should set the expectations of the reader.
-
Target Audience: Identify the intended audience. Is it for Raspberry Pi users? General Linux enthusiasts? Specify the target to tailor the language and technical depth.
-
Article Scope: Precisely define what the article will and will not cover. For example, stating specific hardware configurations supported will manage user expectations.
II. Understanding I2S and Pulseaudio
A. Demystifying I2S
-
What is I2S?: Explain I2S (Inter-IC Sound) in simple terms. Avoid overly technical jargon. Focus on it being a serial communication protocol for digital audio.
-
I2S Advantages: List the benefits of using I2S for audio transmission:
- Direct digital audio transfer (avoiding analog conversions at early stages).
- Improved signal-to-noise ratio compared to analog outputs.
- Synchronization between audio data and clock signals.
-
I2S Key Signals: Briefly describe the main I2S signals:
- BCLK (Bit Clock): The clock signal for serial data transmission.
- LRCLK (Left/Right Clock) or WS (Word Select): Indicates which channel (left or right) is being transmitted.
- DATA (Serial Data): The actual audio data stream.
B. Pulseaudio Explained
-
What is Pulseaudio?: Explain Pulseaudio as a sound server that sits between applications and the audio hardware.
-
Pulseaudio’s Role: Detail Pulseaudio’s functions:
- Audio mixing and routing.
- Volume control.
- Network audio streaming.
- Format conversion.
-
Why Use Pulseaudio with I2S?: Explain the necessity of Pulseaudio, particularly in a general-purpose OS. Describe how it manages the complexity of accessing the I2S hardware.
III. Prerequisites: Hardware and Software
A. Hardware Requirements
-
Single-Board Computer (SBC): List recommended SBCs, e.g., Raspberry Pi (specific models), BeagleBone, etc.
-
I2S DAC (Digital-to-Analog Converter): Provide a list of compatible I2S DACs. Include links to datasheets if possible.
-
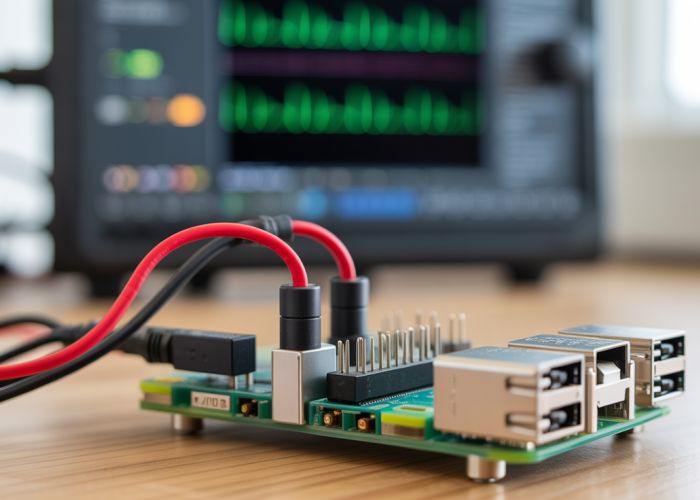
Wiring: Describe the necessary wiring connections between the SBC and the I2S DAC. Use a clear and concise table.
SBC Pin I2S DAC Pin Description GPIO18 BCLK Bit Clock GPIO19 LRCLK Left/Right Clock GPIO20 DATA Serial Data Ground Ground Ground 3.3V/5V VCC Power (Check DAC!)
B. Software Requirements
-
Operating System: Specify the required OS (e.g., Raspberry Pi OS, Debian, Ubuntu).
-
Pulseaudio: Confirm that Pulseaudio is installed and up-to-date. Provide commands for installation or updating.
-
ALSA (Advanced Linux Sound Architecture): Explain ALSA’s role as the low-level audio driver and how it interfaces with Pulseaudio. Ensure ALSA is properly configured before proceeding.
IV. Step-by-Step Configuration
A. Identifying the I2S Device
-
ALSA Configuration: Show how to identify the I2S device using
aplay -l(or similar command). Highlight the device name that will be used later in the configuration. -
Device Tree Overlays (if applicable): For Raspberry Pi, explain how to enable the I2S interface using device tree overlays (
dtparam=i2s=onin/boot/config.txt). Emphasize the correct overlay for the specific DAC used.
B. Configuring ALSA for I2S
-
ALSA Configuration File: Explain how to modify or create the
.asoundrcor/etc/asound.conffile. Provide a sample configuration that defines the I2S device as a default ALSA sound card.pcm.!default {
type hw
card <card_name>
}ctl.!default {
type hw
card <card_name>
}Replace
<card_name>with the actual card name identified earlier.
C. Configuring Pulseaudio
-
Pulseaudio Configuration Files: Explain the relevant Pulseaudio configuration files (e.g.,
/etc/pulse/daemon.conf,~/.config/pulse/daemon.conf). -
Setting the Default Sink: Explain how to configure Pulseaudio to use the ALSA I2S device as the default output (sink). This might involve modifying the
default-sinksetting in the Pulseaudio configuration.default-sink = alsa_output.<card_name>.analog-stereo -
Alternative: Using
pactl: Show how to use thepactlcommand to set the default sink after Pulseaudio has started.pactl list sinks short(to identify the available sinks)pactl set-default-sink <sink_name>(to set the default sink)
D. Troubleshooting
-
Common Issues: List potential problems and their solutions:
- No sound output. (Check wiring, ALSA configuration, Pulseaudio configuration).
- Distorted sound. (Check sample rates, bit depths, I2S DAC compatibility).
- "Card not found" error. (Verify the device tree overlay is loaded correctly for Raspberry Pi.)
- Permission issues. (Ensure the user has access to the audio device).
- Pulseaudio not recognizing ALSA Device. (Restart both services to ensure they’re using updated configurations.)
-
Debugging Tools: Suggest useful tools for debugging audio issues:
alsamixer: For adjusting ALSA volume levels.pacmd list-sinks: For inspecting Pulseaudio sinks.pavucontrol: A graphical Pulseaudio volume control application.
V. Verification and Testing
-
Testing the Audio Setup: Suggest ways to verify that the configuration is working correctly:
- Playing a test audio file using
aplayorspeaker-test. - Playing audio from a multimedia application (e.g., VLC, MPD).
- Playing a test audio file using
-
Audio Quality Assessment: Encourage users to listen critically to the audio and compare it to previous setups.
PulseAudio & I2S Setup: Frequently Asked Questions
This section clarifies common questions regarding setting up PulseAudio with I2S for optimal audio performance, following our step-by-step guide.
What exactly is I2S, and why use it with PulseAudio?
I2S (Inter-IC Sound) is a digital audio interface standard. Using I2S bypasses your device’s built-in analog audio circuitry, providing a cleaner, higher-fidelity audio signal when combined with PulseAudio. This leads to improved audio quality for your projects.
Why would I choose PulseAudio over ALSA for I2S?
While ALSA is the underlying audio system, PulseAudio offers features like volume control, resampling, and network audio streaming, making it more user-friendly and versatile. PulseAudio provides a convenient layer on top of ALSA when dealing with I2S.
Is setting up pulseaudio with I2S difficult?
The difficulty depends on your experience. Our guide breaks down the process into manageable steps. While it involves configuration files and some command-line work, following the instructions carefully will make setting up PulseAudio with I2S straightforward.
Can I use any sound card with PulseAudio and I2S?
Not all sound cards support I2S. You need a sound card or DAC specifically designed with I2S output capabilities. Check the specifications of your audio device to ensure it’s compatible before attempting to configure pulseaudio with I2S.
And that wraps up our guide on configuring pulseaudio with i2s! Hopefully, you’re now rocking some seriously sweet audio. Go forth and make some noise (the good kind, of course!).